In this blog post, we’ll go over some basics for getting started with the Jira Git integration apps. I’ll be using specifically Jira-Bitbucket Integration, but the other ones (such as for GitHub for Jira and GitLab for Jira) behave similarly.
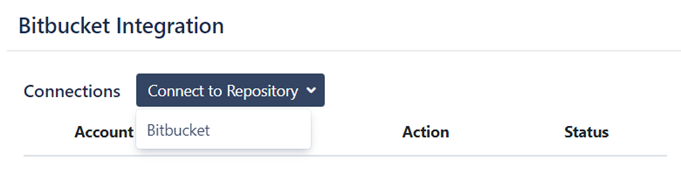
Once installing the app, the first thing to do is to go to the config page (via Apps à Bitbucket Integration). Once there, click on ‘Connect to Repository’:
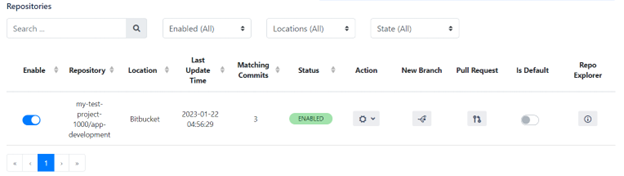
The app will find the Bitbucket account associated with your Jira account, and will ask for authorization to connect it. Once allowing this, something like the following should show up:
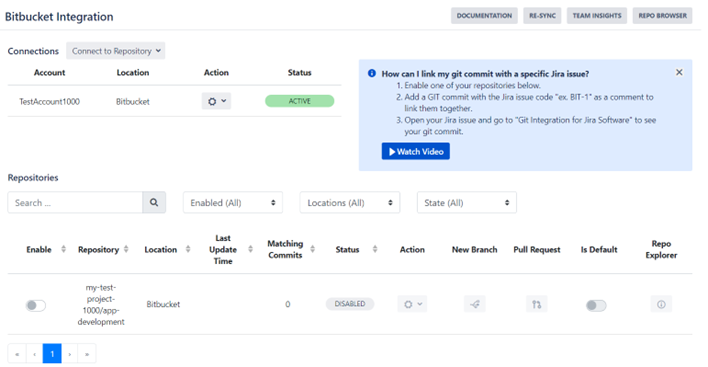
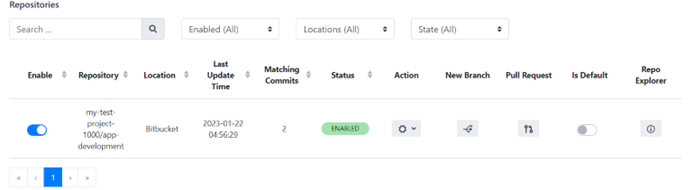
Now you can choose to enable any repos you want with the toggle ‘Enable’ button on the left. For this example I just have one repo for my Bitbucket account, so we’ll enable that one.
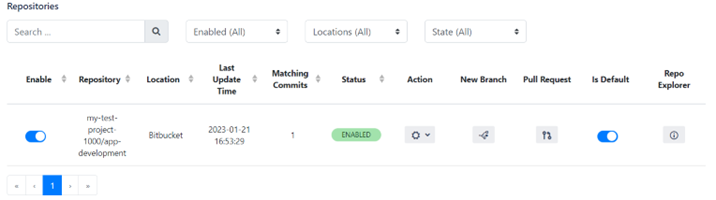
After clicking on enable, the app takes some time to index the repository; when it’s done, it will show a green ‘enabled’ field for the ‘status’ column. Now we’re ready to start using the app to interact with our git repo.
The standard development workflow with Jira and Bitbucket
The process of doing something in git, such as creating a feature or doing a bug fix, tends to involve the following three things:
- Creating a feature branch.
- Making commits.
- Making a PR back into the master branch.
We’ll see how much of this can be done within Jira.
Creating a feature branch
First, to create the feature branch, simply press the ‘New Branch’ button for a given repo.
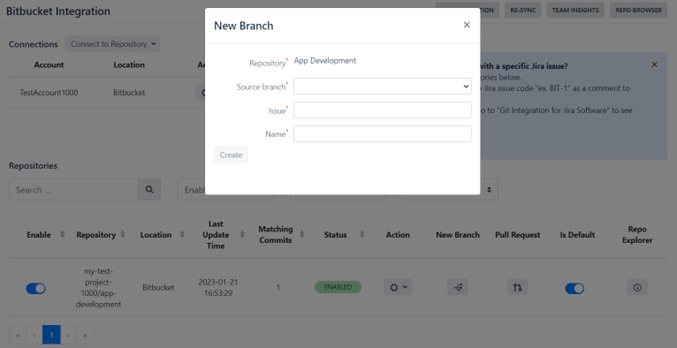
Then, fill in the textboxes:
- The ‘Source branch’ determines the branch you want to base your new branch off of.
- The ‘Issue’ field determines which Jira issues to associate your branch with.
- The ‘Name’ just determines the name of the branch.
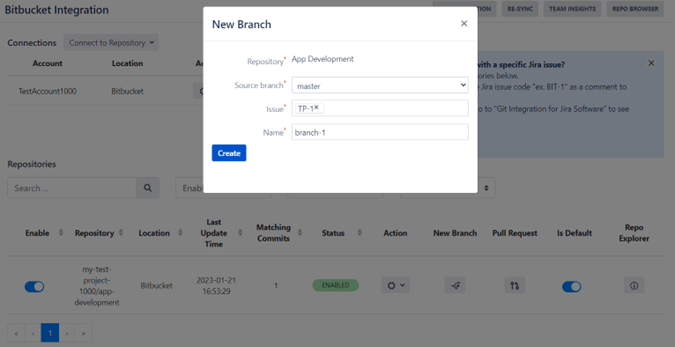
For this example, let’s branch off master to create a branch named ‘branch-1’, and link it to a jira issue called ‘TP-1’:
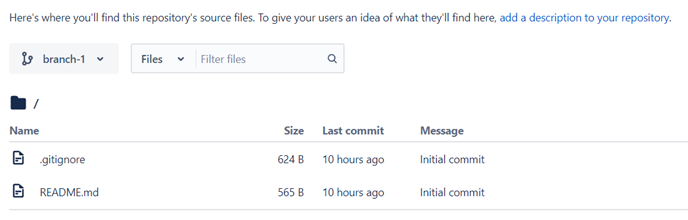
Then after clicking ‘Create’, in Bitbucket we see that a new branch has been created:
Let’s go to the aforementioned ‘TP-1’ Jira issue and see what it shows there.
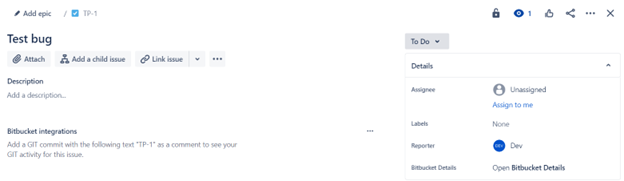
After clicking on ‘Open Bitbucket Details’, the following window appears:
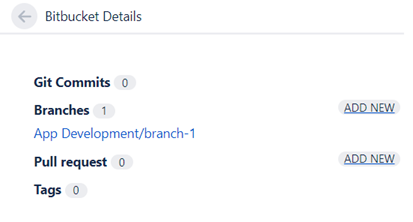
And we can see the new branch. Clicking on the hyperlink would take us to the Bitbucket page for branch-1.
Making Commits
Now let’s make a sample commit to branch-1; for the sake of this example, we’ll just do it in bitbucket, rather than on the local machine.
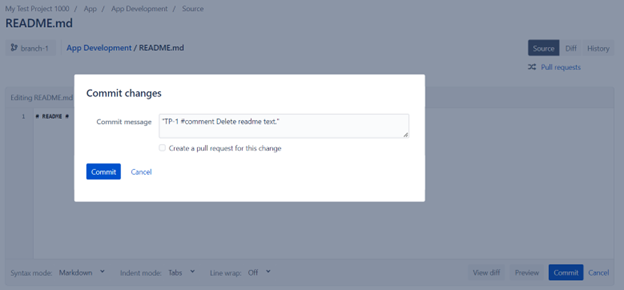
The format this commit message is written in makes the commit a ‘smart commit’. This signals to the Jira app that the commit should be part of the ‘TP-1’ issue, and that the commit message should be shown as a comment in it. We won’t go into detail with that here, but for more info please check out https://docs.bitband.com/git-integration-for-jira/features#smart-commits.
After committing, let’s go to the config page for the app.

At this point, you might need to toggle the ‘Enable’ button to resync with the repo.
Then, after clicking on the Repo Explorer button, this comes up:

This shows the commit made for branch-1.
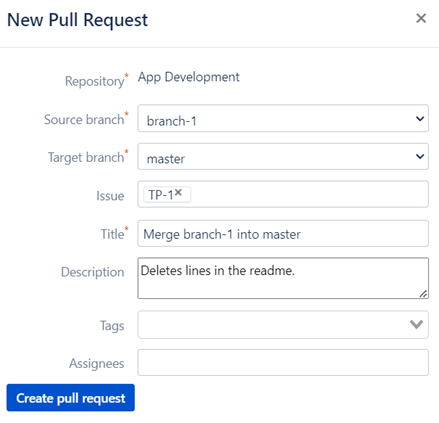
Creating a Pull Request
Now let’s go through how to create a pull request for this branch. This can be done within Jira by again going to the config page, and then clicking on the ‘Pull Request’ button:
And now the window below comes up.
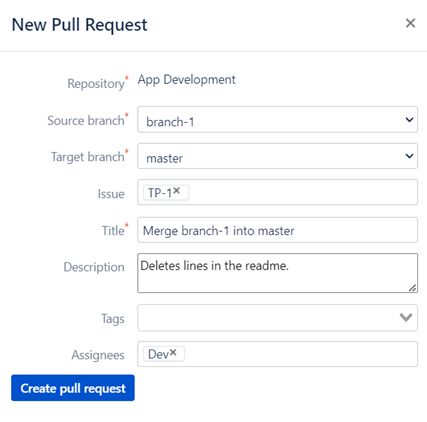
Once filling in the above fields accordingly, we now click on ‘Create pull request’.
However, when doing this, the following error appears:

Since I (‘Dev’) authored the commit in the PR, I’m not allowed to also be the reviewer. So lets try creating a pull request again, but just excluding ‘Dev’ from the ‘Assignees’ textbox entry.
And this is now successful:

We can go to bitbucket and confirm that the pull request has actually been created.
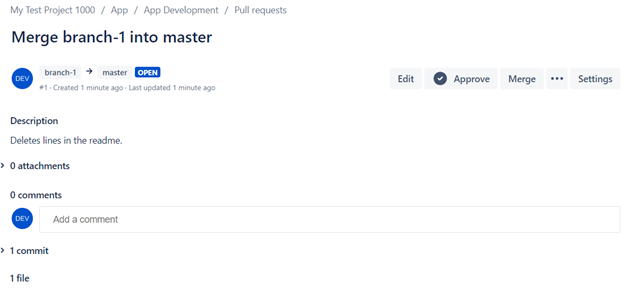
Everything looks good in Bitbucket. The PR has the name and description we gave it back in the Jira integration app. Now let’s merge this PR, and then go back to the config page for the app.
The app now displays ‘3’ matching commits for our repo. This is because I merged the PR, and the merge counts as 1 commit. If we click on the Repo Explorer, this is displayed:
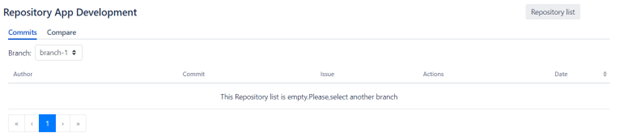
Nothing for branch-1, which is good; when merging the PR in bitbucket, I allowed branch-1 to be deleted.
And if we get the app to display info for master, this comes up:
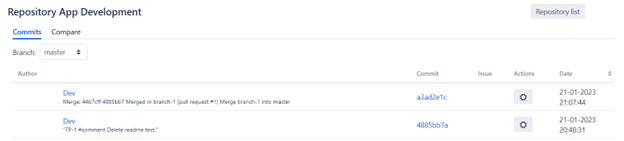
As expected, both the commit made on the feature branch, and the commit for the merge, are now shown as part of the master branch.
If you need any help with the app, you can contact support from the Support page of the product.